Wednesday, August 20, 2014

All that's left is to dog the pooch in the water and watch him walk, right?

Well, not exactly.

First I got a "Pigtail" from work.  Basically a little electrical cord that turns any outlet into a GFI outlet, which is important if you are going to be in the water with an electrical motor that may potentially get splashed.  If you are planning on doing this yourself also you should definitely be using a GFI outlet or a GFI pigtail.  This is no place to skip a corner, as it will result in you and/or your dog getting fried.

Also, when I discussed my plan with the local Vet (in particular their hydrotherapy specialist), and got their opinion on an exercise plan. They said it was important to use warm water as it would help improve blood circulation and reduce stiffness in Austin's leg as he walked.  They also told me to start out at three minutes a walking session twice daily, and that each day the time could be increased by up to ten percent.

I used my kitchen sink, which was close to my garage door, and a hose connection to fill the tank with warm water, but that took about two to three hours to fill the tank.  After my first few times I started to use a large pot and a propane burner to heat large amounts of water at a time.  When I first started doing this it was winter in Wisconsin, so it was also important to make certain that Austin had "done his business" before he went in, because he stayed wet for about three hours afterwards, even with a good towel, and his shaved leg meant he had no protection against the elements.

Austin and me in the tank with the treadmill running.  Please note my sexy swim trunks, and my charming bride feeding him small bits of cheese to keep him walking happily.

Austin's first time in the treadmill was not overly smooth.  He did not understand the concept of a moving floor at all, and continually fell off the back of the treadmill and then I had to shut it down and restart it.  We tried peanut butter on a spatula, beef jerky, and finally pieces of cheese before he was motivated enough to try out the "moving floor."

Quite quickly after he figured out how to not fall off the back of the treadmill he also realized that he could stand on the side of the treadmill with his right two legs on the rail, and his left rear leg was short enough not to touch the treadmill, which then meant he only had to "walk" with one leg.  That necessitated the need for me to put on my trunks and get in the water with him.  Nothing like an Engineer with faith in his design, right?

Austin took to the underwater treadmill walking quickly, and in a few weeks as we went for longer and longer walks, it didn't feel like three hours of wasted time filling a tank for a three minute walk.  In fact, about the time he started going for forty five minute walks by himself in the tank, I finally felt like my effort was paying off.

Austin going for a walk by himself in his treadmill.  He likes to lick the water when he gets tired.  Also, in this picture you can see the reinforcing I added for the "intermediate pulley set."

One thing my wife and I did not realize was how full of energy Austin would be after he got out of the tank.  It doesn't matter if he goes on a brisk walk for a few minutes or just over an hour (which is currently the longest he has ever gone.) when he gets out of the tank all he wants to do is run, jump, and play.  He seems to be much more mobile, as from the time we got him from the humane society to present, the only time he really jumps up on people is after using the treadmill, probably because it eases the pain in his hip that much.

After his next Vet check up the doctor commented on how well Austin was doing and inquired if we were taking him anywhere for therapy.  When my wife told him about the DIY underwater treadmill he insisted on seeing pictures of the unit and asked if I was selling any.  I'm not up for selling any, but I thought I would post this blog so that if anyone else was in need they could find it and do the same thing.

Austin with his new squeaking dragon plushie toy, which lasted about three days.

Austin has been using the treadmill at least twice a week now for six months or so and everything is still working, so I decided it was time to post up the results.  He his a happy dog that enjoys playing with the neighbor's setter/lab mix and while he can't run quite as fast or jump quite as high he holds his own just fine.  He has recently started jumping off our four foot retaining wall because it's just a touch faster when he's fetching a ball, so obviously his hip is feeling better.  He'll never be a high jump champ, or be a long distance runner, but he gets around about as well as any other four legged friend, and he is better than most at relaxing on the floor and watching a formula 1 race with me on Sunday mornings.


With the "guts" of the treadmill worked out, now it was time to get the details right.  Originally I had a long belt connecting from the top drive pulley to the bottom treadmill pulley.  That was quickly modified for two reasons.  The first reason is because it caused water to get carried up the belt and spray off as it went around the drive pulley, which made people nervous about being electrocuted and made Austin nervous about getting blasted with water.  The second reason was the treadmill went just a touch to fast for a recovering puppy with a bad hip.

So I added a set of pulleys in the middle that reduced the speed, and kept the splashing water away from the motor.  I also added some guard covers made out of Wal Mart blue wall guard, which worked amazingly well.  It was easy to work with, fully bendable, and yet sturdy enough to keep the belts, pulleys, and innards away from paws and fingers.

Treadmill with blue plastic "finger and paw" guards on it.  If you look closely in the background you can see the water tank in the background.

Other side of the treadmill where you can see where the power cord comes out of the treadmill, along with the splash guard for the motor.

So far I had spent about seventy dollars.  Thirty three on the treadmill itself, another ten on the misc screws and bolts to hold it together, twenty on the aluminum, and the blue plastic was donated from work with my boss's permission once he heard what I was trying to build.  A few dollars were probably also spent on beer that was consumed during the construction process.

After I had the base built, I measured it to find the appropriate tank and went to a local big box farm supply store and bought a water trough that was big enough for the treadmill to sit inside. At 260 dollars it was by far the most expensive part of the project, and also the part I am still the least happy with.

My store bought water tank leaks.  After I found that out, I took everything out, dried it, and used silicone to no effect, plumbing goop to no effect, and even that black stuff that comes in an aerosol can where they show the guy standing in a boat with a screen door in the bottom where it is sealed up and floating...  Yeah, they should put on those cans, "Your results may vary."

Also, being a metal walled water trough there is no door for the Austin to walk in from, so he needs to be lifted in, which he is not overly fond of.  The reason I put up with it initially is because I thought I would have a better chance of the unit being water tight if it didn't have a door in it, but apparently that's just too much to ask.

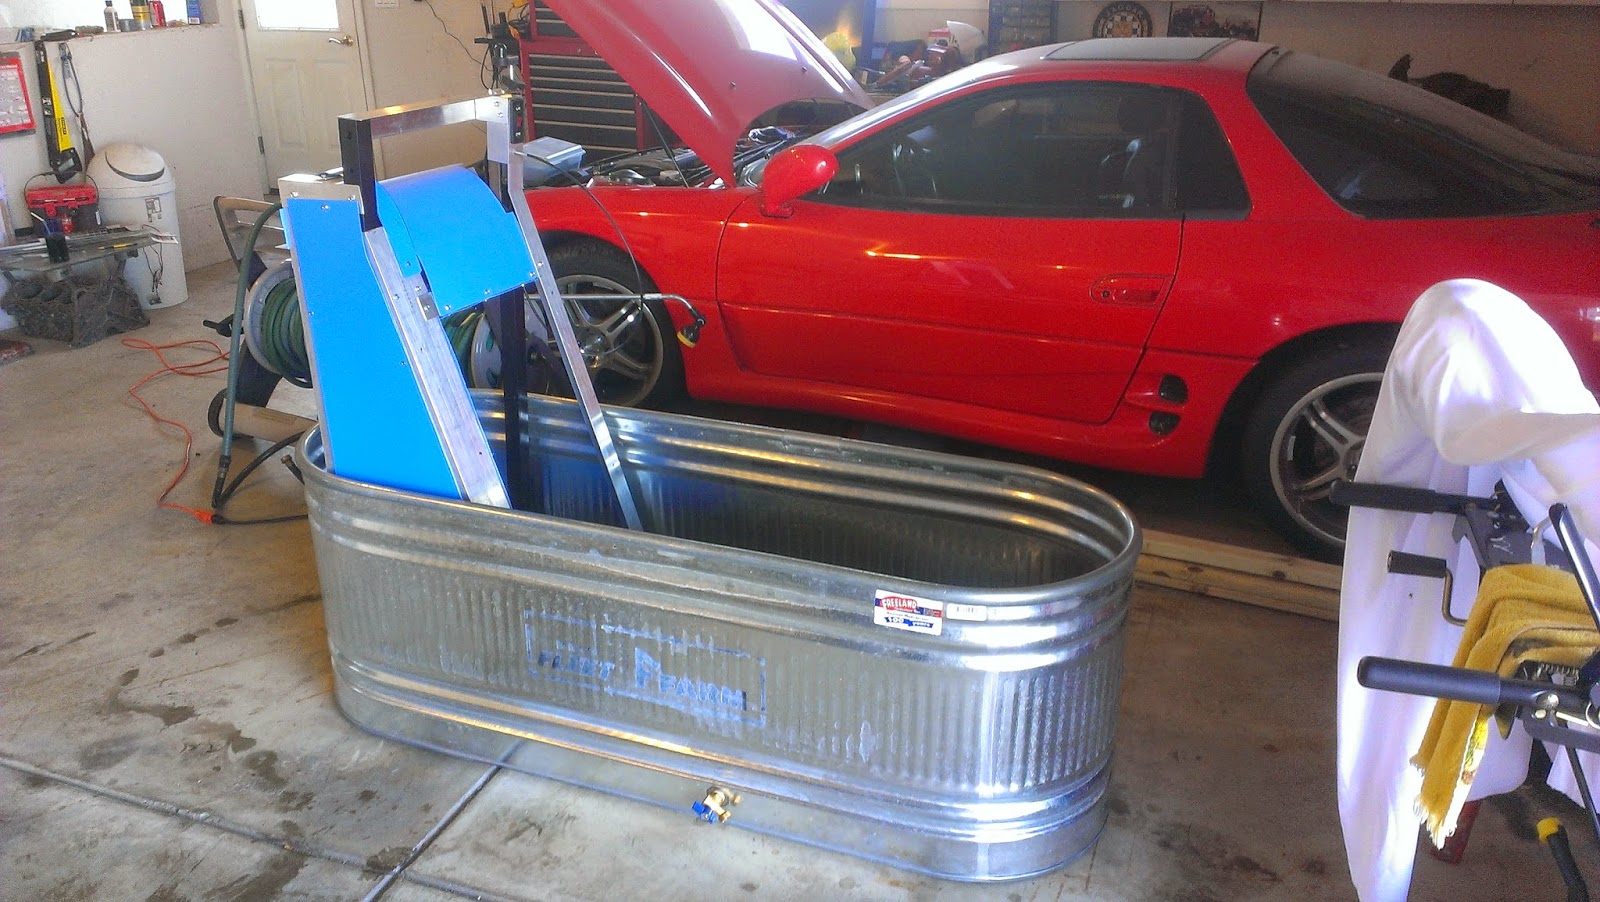
Treadmill in the tank.  Note the drain valve on the lower side of the tank.  Simply attach a hose and the water can be drained wherever you like it.

Other side of the underwater dog treadmill

Here is a picture of the inside of the DIY underwater dog treadmill in the tank waiting to be used.


I'm starting this blog because about a year ago we adopted Austin "De Oh Gee" from the humane society and brought him home.  He and my daughter hit it off immediately, and my wife has slowly warmed up to the "shedding drooly mongrel."

Austin on his blanket.

About a week after we brought him home from the humane society we noticed he had an odd gate as he walked.  We got concerned about it, and brought him into a veterinarian who said those dreaded words that no one every really wants to hear, "Gee, I've never seen anything like this before.  I'm going to recommend you to a specialist."

Ugh.

So, we ventured down to the Fox Valley Animal Referral Center and saw a specialist in Canine bone development who told us, "Your dog was hit by something when he was a very small puppy.  If shattered his rear left leg and it was never set properly, so it healed wrong.  I wouldn't worry about it too much, but if it gets shorter than the other rear leg by more then twenty percent he won't be able to compensate for it on his own and we'll have to cut off the leg."

Now if you're like me, you've probably never heard someone say not to worry about something and then talk about amputation of a limb in the same sentence, but I like to think I'm pretty good at rolling with the punches so I nodded and on our way we went with our limping dog.

Until about a month later when Austin was chasing some leaves around in our back yard as they blew across the grass.  They zigged, he zagged, and then down he went.  He didn't yelp, just had an "I'm broken" look on his face.  He wouldn't get up, even for beef jerky.  My wife eventually managed to carry/treat him to the car and brought him to the vet once more.

Long story short, the ball of his hip had healed incorrectly and while he was chasing a leaf, it had broken off his femur.  Our options were 1) Cut off the leg, 2) Leave it alone and let it heal messed up again, or 3) Femoral Head Ostectomy... which is a fancy way of saying "Cut off the ball of the hip and smooth out the femur."  We decided to go with option three as it would save Austin's leg, and give him the best chance of maintaining his standard of living, as he would still have four legs.

The procedure went smoothly, and we got to see our dog after the procedure was finished as he came out of the anesthesia through the viewing window. 

Austin under the heated blanket in the ICU.

The next day we got to pick him up from the Vet and take him home, with instructions that we were not to let our six month old puppy walk on his leg for a month.  How hard can it be to keep a six month old puppy from wanting to do anything for a month, right?

Austin on the ride home looking fairly drugged up and depressed about being shaved like a poodle.

As we drove home my wife was talking about how the surgeon had recommended rehabilitation via an underwater treadmill to strengthen Austin's leg.  He had said twice a day, every other day.  The price was thirty dollars a session, and it would start up after his muscles had a chance to heal up.  I didn't think the price was bad, but driving back and forth to Appleton every other day for a whole day seemed a bit insane.

Almost instantly my engineering mind turned to solving the problem, and I decided to build our own underwater dog treadmill as it was something that Austin would probably need for the rest of his life.  Of course as soon as I mentioned it to my wife she rolled her eyes and reminded me off all the other projects I still hadn't finished.

Instantly I went in search of DIY underwater dog treadmills on the internet, with google giving me very few hits.  One on youtube, which most closely resembles mechanical set up I used, and then another one on The Working Dog Forum, which is where I got the tank idea from.  I also found a lot of information on commercial models, and the benefits of underwater treadmills and hydrotherapy in general.  Armed with my meager amount of knowledge I set out to build an underwater dog treadmill for under 500 dollars.

Of course, when you set out on that kind of budget Craigslist quickly becomes your best friend.  I managed to find a V-belt driven treadmill less than five miles from my house for the low price of 35 dollars!  I of course then had to talk the guy down to thirty three dollars, because that was two dollars back in my budget.  With a large smile on my face my wife and I loaded the treadmill into the back of our truck and we headed home as my wife became even more certain of the fact that I was going to electrocute either the dog, or myself...  Or quite possibly both of us.

Once home I disassembled the treadmill, and began working on a new frame that would hold the electric motor out of the water.  I used the base of the treadmill for simple ease of mounting the track back down square and then used 2" aluminum angle to mount the motor, on/off switch, and speed control.  The speed control on this old treadmill came from a spring-loaded pulled that separated as more tension was put on the pulley.  The motor was mounted eccentrically, so as it moved via the crank the drive pulley wheel "changed" diameter, effectively increasing the speed of the unit.

Here you can see the frame of the treadmill and the modifications I made to it.  The motor is mounted on the hand rails now, with the speed crank set up on the top, and as you can see a much longer belt will now be needed.